You are currently viewing From Bathroom to Bloom: The Tale of TP Roll Peas

From Bathroom to Bloom: The Tale of TP Roll Peas

Have you seen the social media videos of growing peas in Toilet Paper Rolls? It takes companion planting and upcycling to a new level! Would you try it in your garden? I did, and it worked amazingly well!

For the last couple of seasons, my backyard pea garden has been more of an adventure than a success. I had one banner year with multiple meals featuring delicious fresh peas and beautiful leaves and vines that contributed to tasty salads. Then to my dismay, my efforts barely yielded a pea for the next two summers. I even tried companion planting with radishes. (side note: chives are NOT good pea companions – oops! I learned that the hard way.)

First some critter, either a bird or a squirrel was pulling up the new sprouts and eating the pea seed. Those shoots didn’t even stand a chance! I learned that without the pea seed, the sprout doesn’t survive. So I popped ball jars over the few that survived. It worked! They quickly outgrew the jars and reached for the trellises, but the vines were weak and failed to bloom. So I pulled them down and made them into delicious pea leaf salad instead.

I must have talked about this in my house, car, or with my iPhone nearby because somehow Alexa and Siri learned of my demise. Like any good gossip chain, they must have informed Meta (behind my back, those sneaks!), because sure enough Instagram reels filled with tips from backyard pea gardeners came to my rescue. One post recommended using empty toilet paper rolls (TP) to give garden peas a strong start. I’m just quirky enough to try it and share my journey with you.

December: Start Stock-Piling Empty TP Rolls

I’m a bit obsessive about upcycling (reusing things), so the idea of sprouting peas in empty toilet paper rolls was right up my alley. Much to my family’s chagrin! It took years to train my kids to replace the empty TP roll with a full one and throw the empty one in the trash. You can picture them rolling their eyes now that mom is telling them NOT to throw away the empty roll, but to save them so I could plant peas in them! (Once again reinforcing that they did not need Snow White’s magic mirror to confirm that their mom is the weirdest of them all.)

Reinforcing my craziness, I admit to making rounds of the bathrooms a few times to replace nearly empty rolls with full ones. Just to be sure no empty TP roll was inadvertently thrown away. Yes, I also snagged a few empty paper towel rolls and cut them in thirds to supplement my stockpile.

Eventually, when spring came and the last frost had passed, I had enough rolls to begin planting. It wasn’t elegant, but it worked! Here are some pictures of the journey.

March: Let the Sprouting Begin

The easy part was lining up the TP rolls in the plastic container. Filling them with dirt without losing all the dirt out the bottom was harder than I imagined. I tried to be elegant with my garden gloves and shovel. Then I got real and used my bare hands. It worked much better.

There were a few different types of pea seeds. So I organized them by variety and labeled sticks to identify them. My first big oops was learning to add water to the soil-filled TP rolls BEFORE adding the seeds. I learned this the hard way after carefully planting and labeling each seed, only to water them and watch the seeds (and the soil) float out of the TP rolls and into the bottom of the bin. My carefully sorted seeds were all mixed up! I’m a fast learner though and the second time was a charm.

April: Planting and Nurturing

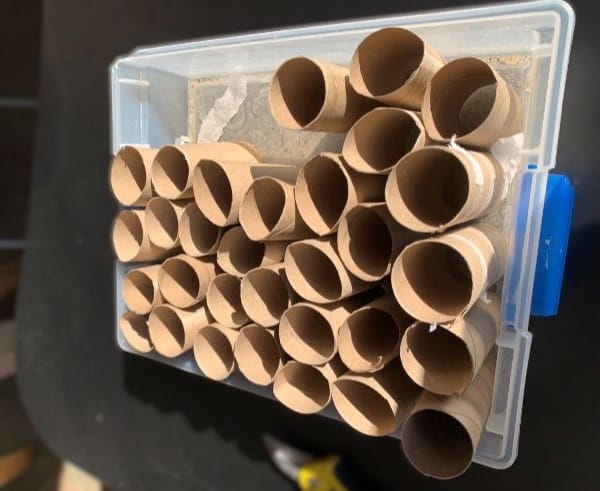
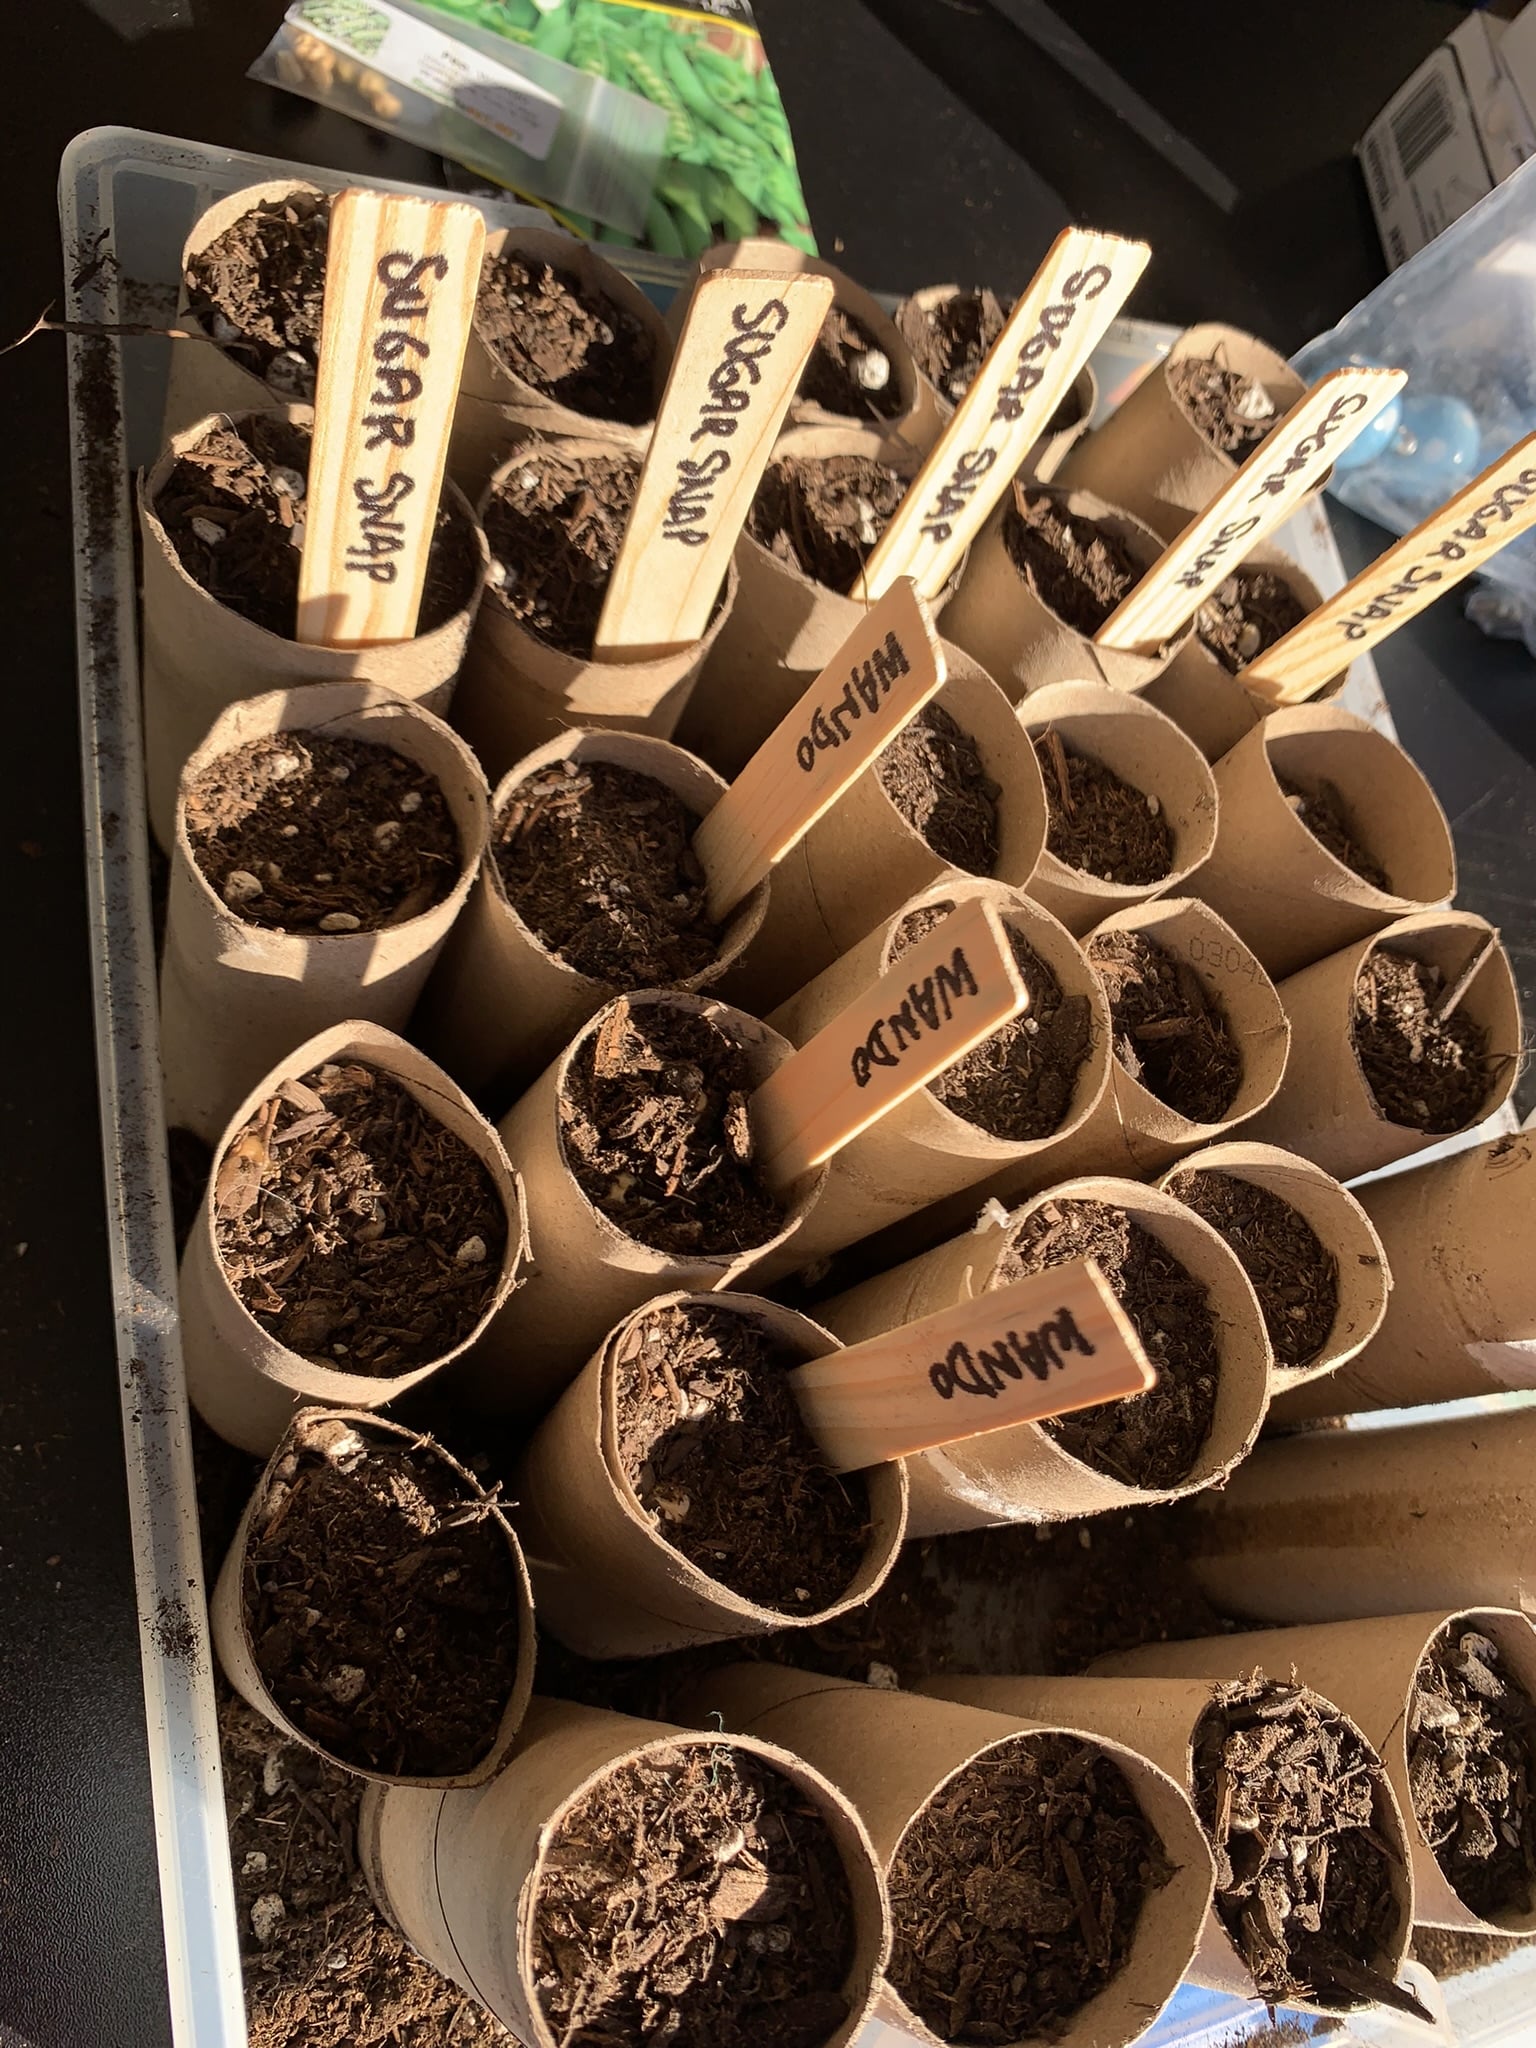
The first 10 days after planting, I kept the planted TP rolls in my garage. Checking daily to keep them moist. The wet cardboard rolls began to separate from the water, but I wasn’t deterred. When a few began to sprout I opened the garage door daily to give them some sun.

After the first few sprouts were 2-3 inches tall, I planted the newborn peas – TP roll and all – in the raised vegetable boxes that I call a garden. The TP roles were disintegrating, so the planting process was soggy. I carefully held them together in one hand while scooping dirt around them with the other.

Glass cloche and chicken wire cloche

Wary of the birds or squirrels who had wreaked havoc in prior seasons, I covered the sprouts in glass jars again. The size that pasta sauce and mayonnaise come in. (You guessed right, I stockpile and reuse jars too!)

The pea varieties sprouted and matured at different paces. A few weeks after giving up on some and discarding them to compost, I discovered them sprouting. You guessed it, I salvaged them and planted them too! The timing was perfect, just as the toddlers were outgrowing their cloches, I had a new batch to plant. Mother nature is amazing!

Once the toddling peas outgrew their Jars, I popped them under homemade chicken-wire garden cloches (my husband’s handiwork). 

May: Training the Peas to Climb

climbing pea trellis
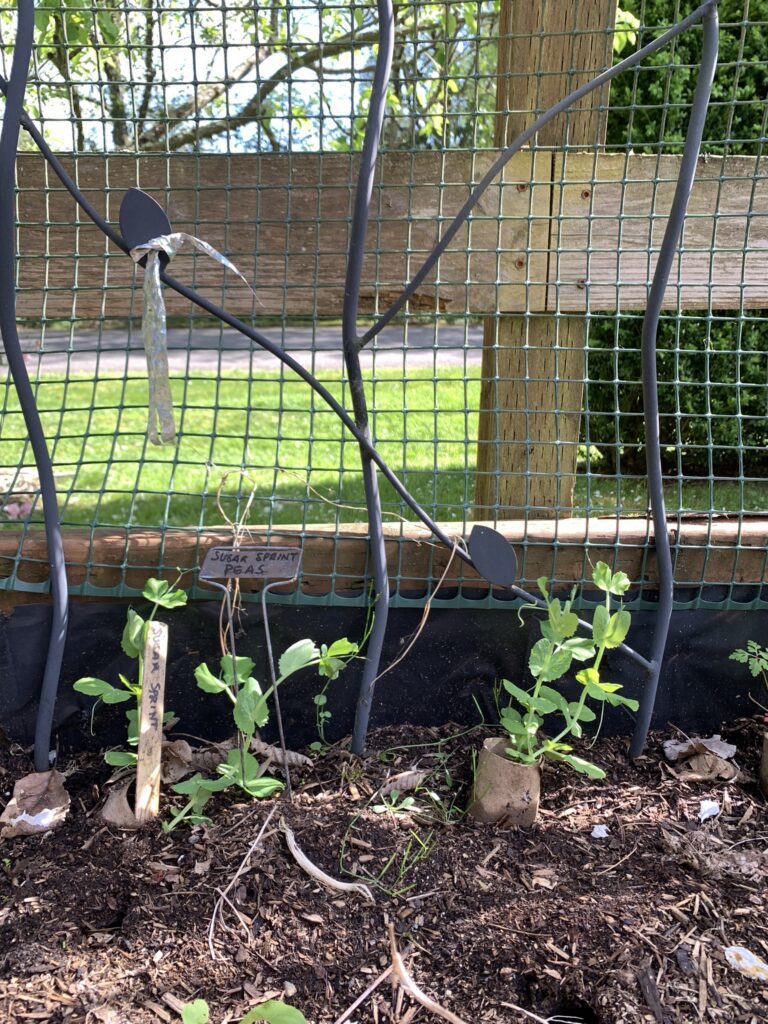
Once they were 8-12 inches tall and beginning to stretch their curly tendrils around the chicken wire, I removed the cloche and guided the pea tendrils to the trellis. There were a few windy days, so I had to redirect them a few times before they took. It was starting to look like a pea garden!

June: Blooming Pea Vines

The young pea vines still needed guidance to keep them climbing upwards, particularly after a hard rain or hailstorm. But I was super excited to see them start to bloom in early June! Eureka!

I’m big into companion planting, so toward the end of June I sprinkled radish seeds around the peas. (I love refrigerator-pickled radishes, so I have an ulterior motive too!). See the link belowpeas and radishes 
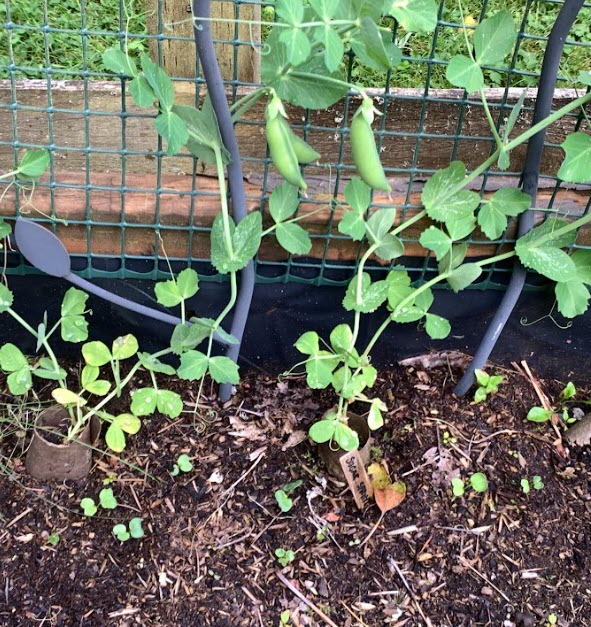
for companion planting strategies for your garden.

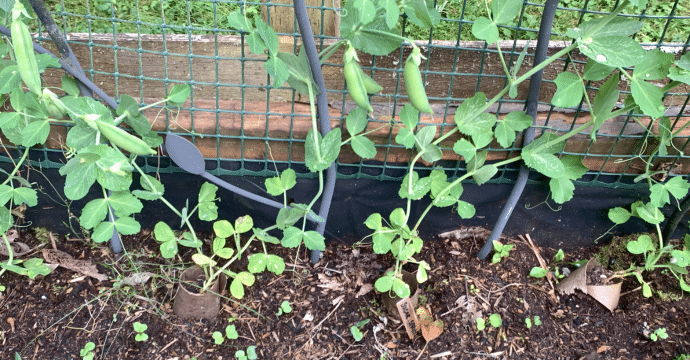
Once the flowers turned to peapods they were heavier, but this year the vines were strong enough to hold them. I call that a success!

July: Let the Harvest Begin

plump peas

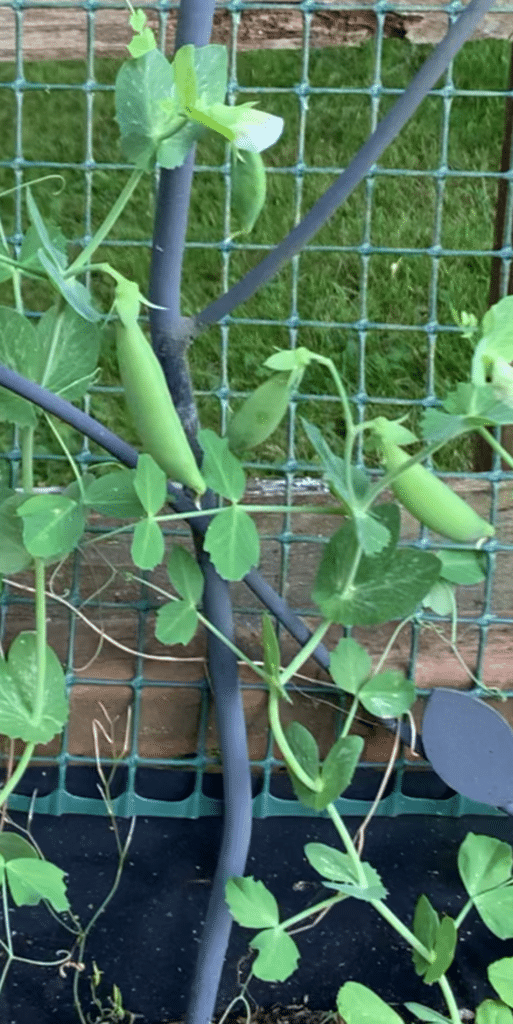
Wow! While I cannot rule out environmental factors, growing peas in toilet paper rolls has been a big win. The peas are plump, plentiful, and beautiful! If you’ve had on-and-off years with your pea garden, I recommend growing your peas in TP rolls too!

The pea varieties that I grew (Pacific Northwest, Zone 7-8 with an alpine convergence zone)

Oregon Snap Peas – I’m a fan of raw or quickly sautéing peas in the shell to each with grilled salmon, these are some of my favorites (a plumper pea and pod than the snow pea variety).

Oregon Giant Snow Peas – The pods remain flat around the peas which can be smaller than other varieties, great for Asian stir-fries because the peas stay snuggly in the pod after slicing.

Sugar Snap Peas – these were the first to sprout and harvest. I like to eat them in the pod. Nice plump peas and pods.

Wando Peas – Best shelled and dropped right into a salad or cooked. The pods get a bit veiny if you leave them on the vine too long. They get quite large too, but not as sweet as the others.

Green Garden Fencing for trellis – I prefer this to netting. It’s not as pretty, but it lasts multiple years; it doesn’t tangle; and birds and squirrels don’t get caught in it.

If you’re interested in companion planting strategies, check out the Farmers Almanac.  It’s got great advice for backyard gardeners. 

Our site contains links to products and services, which may provide us with a commission. Prices provided are up-to-date when posted. As an Amazon Associates, we earn from qualifying purchases.

Share this post:

Author

  • Christy Marble Profile

    Christy is a wife, mother of twin teenagers, a 3x CMO, an advisor and mentor who lives in the Seattle area. She finds joy in the everyday magic of nature and wildlife and loves to travel, cook, garden, and spend time with family and friends.

    View all posts